
How to Migrate Shopify to WooCommerce
Summary
The WooCommerce plugin for WordPress is quickly becoming one of the most popular ways to manage an eCommerce business. Due to this, we are seeing many people migrate to WooCommerce from other eCommerce platforms. In this guide, we will go over some of the best options for moving your online store over to WooCommerce.
When migrating from Shopify to WooCommerce, you can perform a manual export and import of the products or use a 3rd party plugin. With a manual migration you will need to export all your products from Shopify, then copy them into a spreadsheet that is compatible with WooCommerce. You can then import all of the products at one time. Migrating the orders and customers will be a similar process.
- Exporting Products from Shopify
If you export up to one page of products (up to 50 products), then the CSV file is downloaded by your browser. If you export more than one page of products (51 or more products), then the CSV file is emailed to you. The file is sent to the store owner's email.
- From your Shopify admin, go to Products > All products.
- Click Export.
- From the dialogue box, choose the products you want to export: The current page of products, all products, products you have selected and products that match your search and filters.
Select which type of CSV file you want to export
CSV file for Excel, Numbers, or another spreadsheet program: Use this format if you plan to use a spreadsheet program to edit your product CSV file.
Plain CSV file: Use this format if you plan to use a plain-text editor with your product CSV file.
Click Export products.
Access your product image files
If you move your products to a new website and plan to close your current store or delete some of its product listings, then you need to upload your product CSV file to your new store while your old store and its product listings remain viewable. When you export your products, the images associated with each product are not included in the CSV file. If you import the products to a new store, then the product images are generated only if they remain viewable on a publicly accessible website.
To ensure that your product images remain accessible to you, leave your original store and its products intact until you finish the import process. This allows your new store to assign the correct product image to each listing.
Filter and export your products list
You can use filters to organize your products list before exporting. If you need to change only some of your products, then you can add a filter. It could be easier to edit your products using a shortened CSV, rather than your entire product list.
- On the Products page in Shopify, add a filter using conditions that list only the necessary products.
- Export your products list, and make sure that you select the option to export only the products matching your filter.
- A CSV file containing only those products in your filtered list will export.
- After you make any changes to your exported product CSV, you can import the edited CSV file back to Shopify.
- Import Products on WooCommerce
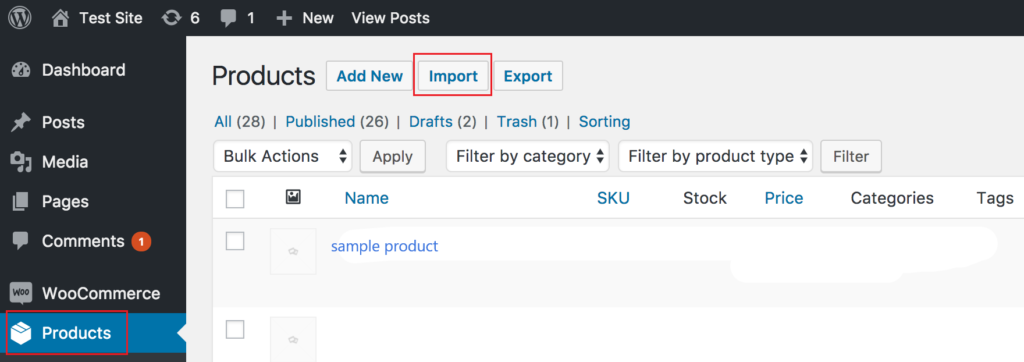
Now that you have the store data, how do you get that data imported into your WooCommerce store? WooCommerce does have a native CSV importer for products which can be of use, but it has certain limits. If you have to import a number of CSV files, you’ll need to map each of the fields in the CSV for each part of the product import (like the product title and product SKU, for instance). To import a CSV file, go to WooCommerce > Products and select Import. Choose the CSV file, confirm all of the field mapping, then run the importer.
Alternative – Use WP All Import
If you’d rather not manually map all of the fields for each import, there is an excellent paid plugin for WordPress which will allow you to import in customers, orders, and products. It’s WP All Import and has add-on plugins for users and WooCommerce. The WooCommerce add-on will allow you to import products, and orders and the user’s add-on will allow you to import in customers. You’ll need to purchase and install the WP All Import plugin to proceed with these directions.
To make the process easier WP All Import allows you to create templates. Since we are importing products in this article, we’ve created a template to map all of the product fields for a product import. To import products using this template, save this template as a TXT file.
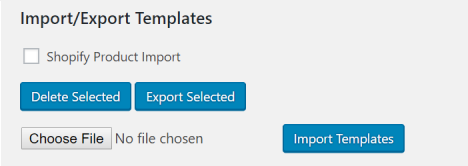
Open the plug in and go to All Import > Settings. In the Import/Export Templates section, select the text template file and import it. After the template file has been imported correctly, you will see there is now a template file.
To import your product CSV export from Shopify in WP All Import go to All Import > New Import. Select the CSV file and then select New Items and select the WooCommerce Products type.
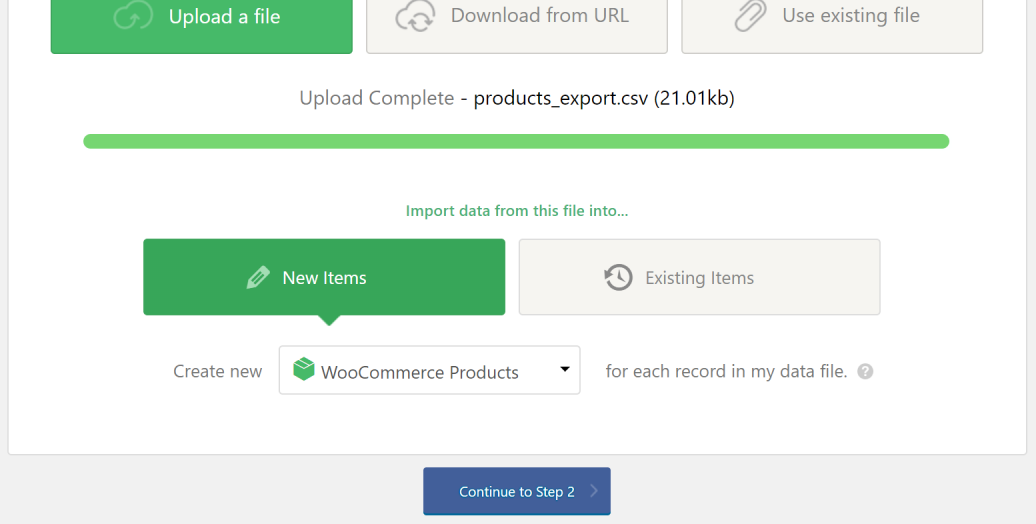
Confirm the number of rows to imported and then continue to Step 3.

Now you can continue and all products which were exported from the Shopify store will be imported into WooCommerce. The images used on the store on Shopify will be imported into the store’s media library during the import, and then mapped into the product. The products will contain the correct data, as well as the featured image.
Customers and orders can also be exported from Shopify as CSV files. Customers can be imported using WP All Import Pro, with the user’s add-on, and orders can be imported using the WP All Import Pro Woocommerce add-on. This only covers retrieving the data from Shopify, then importing into WooCommerce.
There are some out of the box solutions to migrate from Shopfy to WooCommerce as below:
https://wordpress.org/plugins/cart2cart-shopify-to-woocommerce-migration/
https://wordpress.org/plugins/import-shopify-to-woocommerce/
https://litextension.com/woocommerce-migration-tool/shopify-to-woocommerce.html
- Export Shopify orders to a CSV file
You can export a comma-separated values (CSV) spreadsheet of your orders from the Orders page of your Shopify admin to see a broad overview of your complete order information.
Export orders
You can export orders along with their transaction histories or you can export only the transaction histories of your orders. The transaction histories that are included in your CSV file include the captured payments data only. Authorization data is not included in your exported transaction histories.
Steps
- Sort and filter your orders.
- From the Orders page, click Export.
- In the Export orders window, select the option for the orders that you want to export. For example, if you want to export your orders by date, then click Export orders by date and set the start and end dates for the orders that you want to export.
- Choose the format that you want to export your orders to.
- If you want to download all the information about your orders, then click Export orders.
If you want to download your transaction information only, then click Export transaction histories. You'll have one of the following scenarios when you're trying to export orders:
- When you export up to one full page of orders (up to 50 orders), the CSV file is downloaded by your browser.
- When you export more than one page of orders (51 or more orders), the CSV file is emailed to you and the Shopify store owner.
- If the export fails, then you'll receive an email with this information.
- Import orders in WooCommerce
Follow the instructions at
https://docs.woocommerce.com/document/customer-order-csv-import-suite/
- Importing and exporting customer lists
Export existing customers to a CSV file
- From your Shopify admin, go to Customers.
- Click Export
Click one of the following export options:
- Current page to export the customers showing in your store admin
- All customers to export all your store's customers
- Selected customer to export customers you have selected
- Current Search to export a filtered list of customers.
Select which file format you want to export
- Select CSV for Excel, Numbers, and other spreadsheet programs if you plan to use a spreadsheet program with your customer CSV.
- Select Plain CSV file if you plan to use a plain-text editor with your customer CSV.
Click Export customers.
- Import Existing Customer to WooCommerce using the customer CSV
Follow the instructions at https://docs.woocommerce.com/document/woocommerce-memberships-import-and-export/